Showing posts with label Children. Show all posts

Monday, 21 July 2014

Easy Peasy Teacher Thank You Card and Gift

Big Girl has been at pre-school a whole year, I can't believe it! She's learnt so much from her time there and the ladies who taught her were lovely. I'm not a big fan of jumping on American bandwagons, I think that's what "teacher appreciation" is?! I wanted our gift and card to be genuinely made by Big Girl. So it had to be easy if I was going to get her to do it three times!

I just wrote out "thank you" on a piece of paper and got her to stick the letters I had cut out from magazines the day before on to the cards in the right order. She has really got into writing recently and she did very well picking the right letters and glueing them on, she really enjoyed it. She did decorate them a bit more after this picture was taken, with sticky gems and tin foil, the current favourite!


We also made gifts. We decorated large mayonaise jars by sticking tissue paper shapes to them. I used watered down PVA glue. I also painted over the jar with another a layer once Big Girl had finished.

 I bought some epsom salts from Ebay and we made our own bath salts using this tutorial from Simply Designing. We used lavender essential oil as that's what I have. On reflection I would have added some lavender flowers as well as the rose petals but it did still look really pretty. It was a lovely thing to do together and simple enough for Big Girl. We popped a church candle in the bottom of the jar so that when the salts are gone the teachers can use them as candle holders. The lids were a rather garish blue so I spray painted them white and finished them off with a personalise lable and some satin ribbon. The ladies did seem pleased! 

Monday, 30 June 2014

Baby Boy Joules Rabbit Dolly

Not very long ago I sold one of my New Baby Gift Vouchers to a good friend and a couple of weeks ago she bought me her friend's child's garments.


They included a stunning Joules top which I just had to showcase on the little boy's trousers, using the iconic little Joules rabbit alongside his personalisation! I'm sure you'll agree that the result is a very cute little keepsake?!


Find out more about all my keepsakes at


or 

Monday, 9 June 2014

Bake Bread 2gether! Only 2 ingredients!


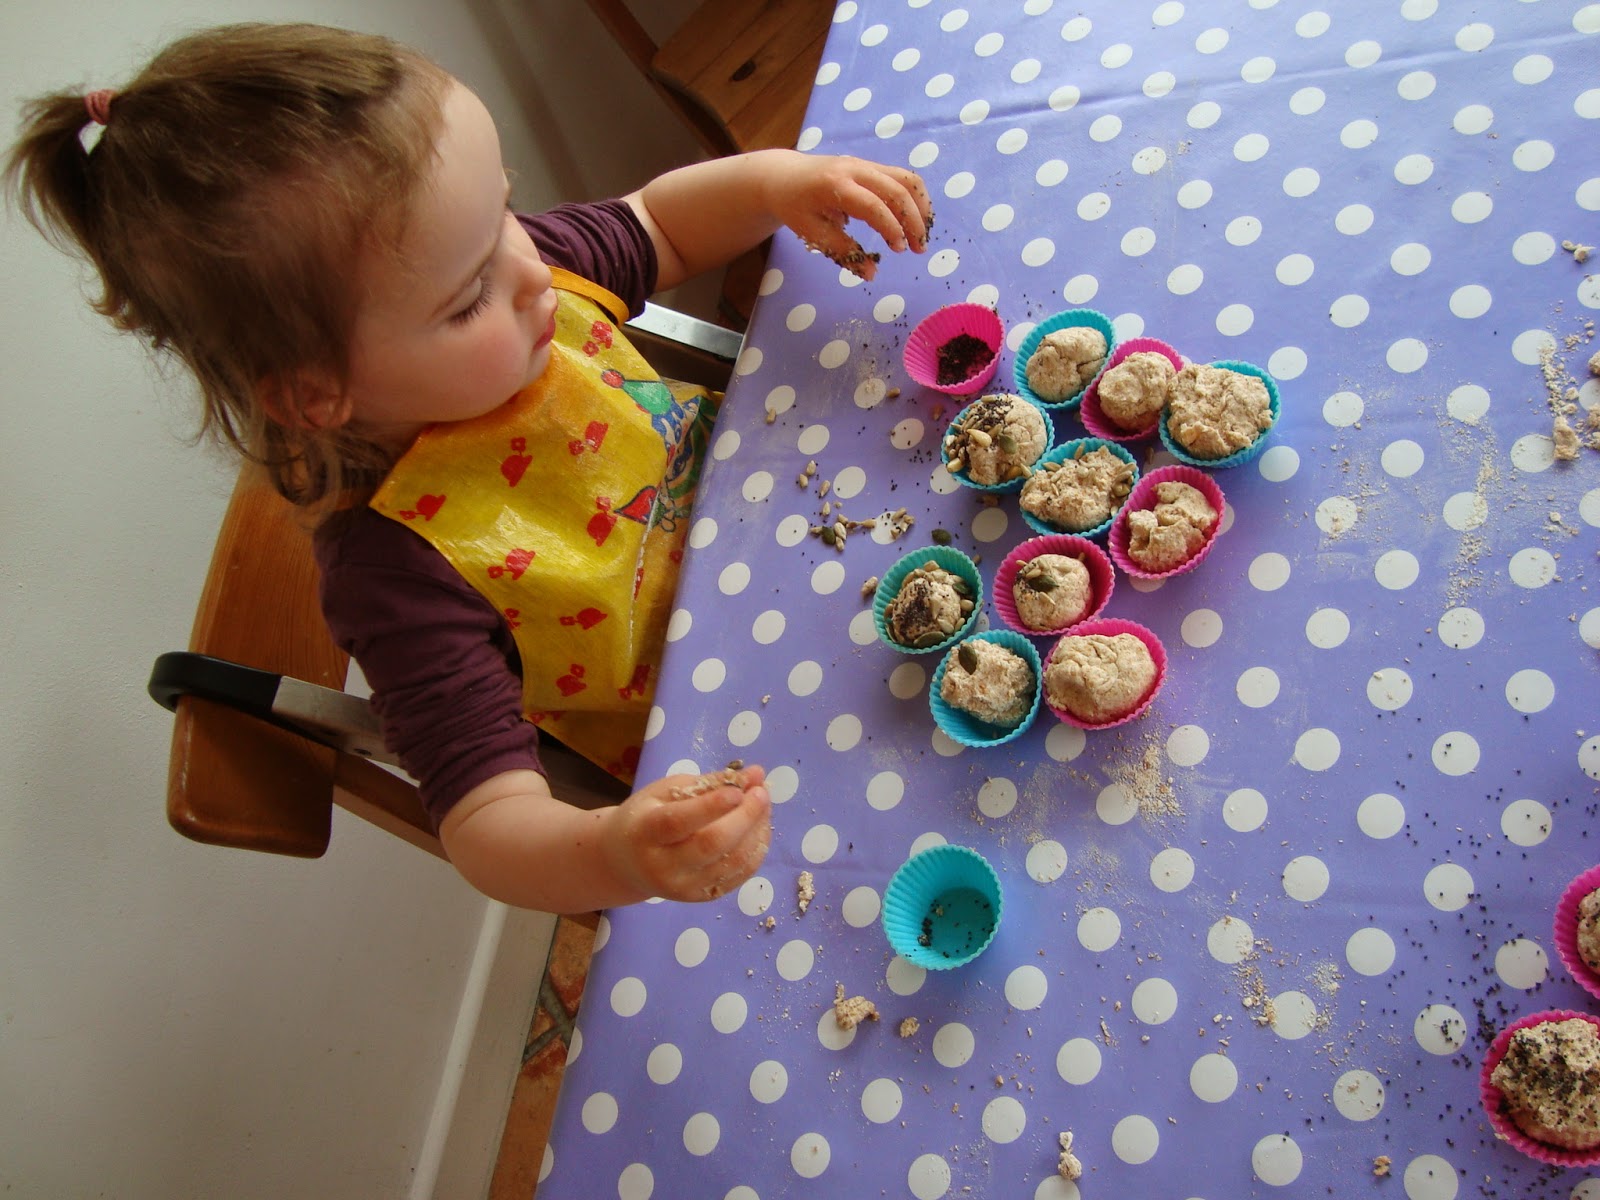
Bake Bread 2gether, only 2 ingredients! I couldn't believe my eyes when I came across a link to this lovely website via Pinterest. Bread, from two ingredients?!? Never! But yes, it is that easy and we had a great time. The ingredients are  


  • 1 cup of self-raising flour
  • 2/3 cup of Greek yogurt

  • So easy, right? I also gave my girls silicone cup cake cases full of seeds to decorate their bread with. I was learning on the hoof with this one and quickly realised that my girls (2.5yrs x2 and 4yrs) were not going to be able to form their own shapes from the bread easily so I gave them more of the cup cake cases and they filled these, which made nice little buns.


    I was careful to bake the bread knowing whose was whose so that they could eat their own. I have to say that I thought it was quite doughy and rather sour but the girls were still keen to try their bakes. 


    We made quite a lot of bread so I did freeze some of it. We've had more out since and this time I slathered it with cream cheese and this time it was eaten more enthusiastically. I would definately like to try this activity again.


    Sunday, 27 April 2014

    Thrifty, NO Tat Party Bags

     My big girl has only been to a few parties so far and in this time I have learnt to grab the party bag at the first opportunity and NEVER ever let her have it to herself in the back of the car by herself on the way home. I am going to come across like an ungrateful wretch but the contents of the bags we have had have sometimes been plastic toys suitable for older children or just packed full of sweets so I do prefer to go through it first and then let her have a few bits at a time. And the thing is I know that they cost a lot to put together and taken someone time to put together, so I do feel bad for being a bit anti-party bag.

    Big Girl has just turned four herself and we had a little birthday tea party for her this weekend. Now my first advantage was that we only invited three friends so I didn't have many bags to make but I did also make bags for my two nephews for the outing we had with them to a farm the previous weekend. I really wanted to make nice, no tat party bags and still not spend too much. As always Pinterest obliged, together with a few of my own ideas this is what I came up with.

    Boys:
    A pack of colouring pencils (around 20p in Wilkinsons)
    Easter chocolate coins (I bought two bags from Aldi to do all the party bags)
    Dinosaur paper toy 
    Felt car topped pencils
    Bubbles (I happened to have these already and you can't beat bubbles, right?)
    Easter bark egg (if I'm honest I just used the party as an excuse to have a go at this!) I wrapped my egg shapes in clingfilm to protect them in the bag. I guess you could use any cookie cutter, maybe use one that fits your party theme?

    Girls: 
    Wooden bead bracelets (I spent around £2 on beads from eBay and made bracelets with elastic I already had. Anyone can do this, it's just threading beads and tying a knot! You could even do it with an older child)
    Stickers (Again eBay. I did kick myself though because I thought I was getting more stickers than I did. I have since discovered that our 99p shop does little boxes of stickers in packs of about 8.
    A pack of colouring pencils
    Easter chocolate coins
    Butterfly paper toy intructions
    Easter bark egg
    Homemade hairclips (I bought a pack of about 20 clips from the £1 shop and cut small discs of colourful felt from my scraps box. Along with some teeny buttons I had I sewed it altogether onto the clip. I thought it would be a nice touch to print little ' thank you for coming to my party' notes on card that I could snap the clips onto.

    The inspiration for a lot of these ideas came from this pin. There are lots of other ideas on there too.

    The bags:
    I was really lucky, in the £1 shops Easter product range they had packs of 20 cellophane bags with pretty spring images printed on them. They even came with  short lengths of organza ribbon to tie the bags up. I must admit I thought they were such a bargain I stockpilled, keeping some for other parties, other projects!


    Oh and just in case you were wondering, here is Big Girl's cake


    Thursday, 6 March 2014

    Masterpieces

    This makes me very happy as it's something I've been meaning to get around to for ages. Big Girl brings home new artwork from school every day and I really like the idea of showcasing the girls' efforts and showing them we are proud of them.

    I used some adhesive cable clips which we bought from Ebay to sort out the TV's cables and some white picture hanging thread from Robert Dyas. After knotting the cord I did melt the ends with a lighter to make them neater and secure them.

    I went through the fonts on my computer and chose the one I liked best. In Paintshop Pro I flipped it to a mirror image and then split it in two so I could print it at my desired size, 50cm long. I used greaseproof paper to trace the print outs and then laid it on the wall and rubbed over the pencil lines with a pencil to transfer them onto the wall. I used a tester pot of normal wall paint to fill in the letters. I had little wooden pegs already, they're just right for hanging the masterpieces.

    I still use a one in, one out system where Big Girl pick what she's going to replace with her latest efforts!

    Saturday, 18 January 2014

    Eggy Bread Cups

    In my quest to make yummy teas, and having seen similar things on Pintrest I am sure, I have started making the girls Eggy Bread Cups. They already love eggy bread so these have been easy to introduce even to my fussy big girl.

    I cut the crusts off six slices of bread and cut them in half. Then I liberally greased a muffin tin with sunflower oil. I pressed the two strips of bread into the holes in a cross shape, overlapping each other. Then I whisked together three eggs and a slosh of milk. Half this mixture got poured on top of the bread. The other half mixed together with about 75g of cheddar and some cubed ham. We've also added  slices of sausage and next time I plan to sneak in some veg, with sweetcorn! I divided the mixture between the cups and popped the tray in the fridge for about an hour to allow the egg to soak into the bread. 20 minutes would probably do though.  After brushing the tops of the bread with olive oil I cooked them on around 200C for 20 minutes.

    They have been extremely well received so are bound to become a regular feature on our teatime menu.


    Friday, 11 October 2013

    Quesadillas!

    When I take my eye off the ball tea-times (the girls' lighter meal) get very samey; cream cheese sandwiches, crackers and cream cheese, eggy bread, scrambled egg etc. All fine but I have learnt to my cost, with my Big Girl, that variety is good for children and introducing them to new foods is important. So I do try to do new things.

    They like tortilla wraps but I don't like the fact that I buy a packet and they will only need two or three. It ocured to me that I must be able to make them myself, and maybe I might be able to freeze the left over dough and only cook them when I need them. 

    I found a great recipe. I would say if you want a tortilla that fills a normal size  frying pan then it makes more like 10 portions, not 12. I used two, wrapped the others individually in cling film and popped them into a bag and into the freezer. I have since used two from the freezer and they freeze and defrost just fine. But if you're going to make quesadillas, as below then I recommend cooking them with the filling, not before.

    So, I took my two dough portions out of the freezer and rolled them out with a little flour on the work surface. Heated the frying pan and then popped in the first tortilla. Spread homemade tomato sauce* on the tortilla, and then topped with beans (kidney are best but cannellini, as in the photo, are fine) and cheese, and then the second tortilla. It takes around 10-15mins, flipping it a few times. I put a plate on top, then placing a hand on top, turn it over and slide it back into the pan.
    When it's cooked you can slice it up with a pizza wheel and, once it's cool, pass it round your little ones. My three gobbled one of these down between them. 


    * I add courgettes and carrots to my homemade tomato sauce in a sneaky Mummy attempt to get veggies into them. I make a huge vat of sauce and freeze it up in little pots. It also gets used as a pasta sauce and we make pizzas, Big Girl helps me, we cut rounds out of pieces of toast and top the tomato sauce with sweetcorn, some sort of cooked meat and cheese. They get gobbled too.
     I love cooking for them when they eat!

    Monday, 7 October 2013

    A Bit Girly

    I've decided to get a wriggle on with the girls' stockings. The will still have beautiful presents on a budget, it just takes a bit more organisation and planning. The only thing I bought for these crowns and wands were the ribbons. The rest is all from my scraps bag.

    The crowns are fastened at the back with a button and some sparkly elastic that was in my wrapping box from last Christmas! They were inspired by this lovely blog post, although I used fleece instead of felt, it's so lovely and soft.

    I was going to make these wands but I think the little ones are still a bit young for them. I would worry about them having
    beads and wire! My wands have gardening green sticks that I've wrapped with wadding inside them.

    Really, really pleased with how they've turned out. It's a shame I have such a long wait now to give them to them!

    Monday, 9 September 2013

    Super Heros!

    A friend of mine has a son who turned 6 and a daughter who turned 8, both in August, 9 days apart! So I made these personalised super hero capes and masks. I designed their logos on the PC. I really enjoyed making them, a few more children might get them as presents yet!


    There are a couple of super hero pins on my Pintrest 'Presents' board. I took a little bit of inspiration from most of them

    Saturday, 7 September 2013

    Bored...

    ...of this

    "Please excuse the mess, the children are making memories!"

     I prefer this


    Grumpy, moi?!

    Wednesday, 28 August 2013

    Getting everyone involved in baking!


    As I said recently I am always looking for things that all three of my girls will enjoy. Big Girl and I used to bake a lot when the Little Ones were too small to understand they were being left out but more recently they have been hanging around the kitchen stair gate getting cross with us - oops!

    So I've taken to trying to do baking and cooking activities at the dinning room table. I have given them their own bowl, spoon and some of the ingredients, flour, water, maybe some raisins. But last week we were making rice crispy cakes and I just couldn't face the carnage involved with letting them loose with chocolate. So I gave them some silicone cake molds, bowls, spoons and cotton wool balls. They were perfectly happy moving the cotton wool from one to the other. I'm guessing it's good for their fine motor skills too? Bonus!


    The only problem was that Big Girl quickly lost interest in the cooking and asked for her own cotton wool. Leaving me to fill the molds. Oh well.... you win some, you loose some!


    Sunday, 18 August 2013

    Cereal Box Handbags

    I don't know how I came up with this idea but for once I don't think it came from Pintrest! (Unless Pintrest is now seeping into my brain without me realising!)

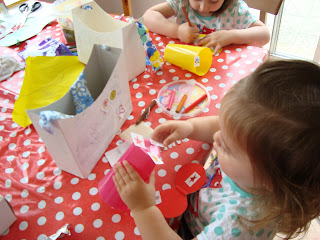
    I'm always looking for things to do with all three of my girls. Big Girl (nearly 3.5yrs!) loves to do crafty stuff but if I let her do things at the table she'll always drop things that will find their way into the mouths of the twins, and anyway they prefer to be sat at the table joining in with us but their time span is short and obviously, only being 18 months old, their creative skills are limited.

    So I started with some cereal boxes which I painted white to cover the labeling, I guess you could cover them with paper too. I used a plate to create the top shape of the bag.


    Then used the piece I'd removed to get a pretty much identical shape to the other side


    I punched holes in the sides and added fabric strip scraps to make handles (different ones so they knew whose was whose!)


    Over to the children! Big Girl started off colouring hers


    The little ones were content sticking stickers all over theirs!


    Ta da! Not going to be sold by Louis Vuitton but still be played with in this house! (And a good place to put those stickers Big Girl got at the dentist last week!)


    And Mummy made them cardboard combs and compact mirrors from tin foil and card to keep in their bags!


    Saturday, 27 July 2013

    Summer 2013 in Our Garden

    Last year we didn't spend a lot of time in our garden, almost none as a family. The weather wasn't great and it really wasn't easy with two six month olds. So Big Girl (aka Bambina) spent a of time out there with PJ alone while I stayed inside with the twins.

    This year proved even more of a challenge as the Little Ones are now mobile and eat EVERYTHING and I mean everything! But I really wanted to spend time outdoors with them. Big Girl really loves it. So this is what we have done...


    It cost us £35, although our neighbour did provide the four extra metal stakes that I didn't realise we would need. Each side of trellis netting is about 5m wide, too long for there not to be another support in the middle.

    I was thrilled to buy about eight garden toys, some of which you can see here, on Ebay for £15 and to get a playhouse from the local paper for £30.


    Add a sun canopy, purchased with Clubcard vouchers last year and a water table, Big Girl's birthday present from her grandparents and we are all set.

    We have spent hours out there, with lots of playdates too! The fact that the Little Ones can't go digging in the flower beds, falling off the deck or tripping up on the patio means that I can manage on my own during the week. I even get to sit down sometimes!

    My project for me was to plant out this wall. It's only occurred to me, after five years of living here to look under the stones. And I found, beneath a membrane, that there was pretty good soil. So once I removed the soil I just added a bit of compost to top it up. I bought heather and ivy plants and got two thyme plants delivered with our weekly groceries. I already had the lavender in a pot and I grew chives, aubretia and bellis perennis from seed. As well as colours that I like I am aiming to cover up the wall, which I hate, a bit! I am so pleased with the results. I am definitely going to do the other half next year.